Custom Components GalleryNEW
Explore
Custom Components GalleryNEW
Explore How to share your Gradio app:
%20Copyright%202022%20Fonticons,%20Inc.%20--%3e%3cpath%20d='M172.5%20131.1C228.1%2075.51%20320.5%2075.51%20376.1%20131.1C426.1%20181.1%20433.5%20260.8%20392.4%20318.3L391.3%20319.9C381%20334.2%20361%20337.6%20346.7%20327.3C332.3%20317%20328.9%20297%20339.2%20282.7L340.3%20281.1C363.2%20249%20359.6%20205.1%20331.7%20177.2C300.3%20145.8%20249.2%20145.8%20217.7%20177.2L105.5%20289.5C73.99%20320.1%2073.99%20372%20105.5%20403.5C133.3%20431.4%20177.3%20435%20209.3%20412.1L210.9%20410.1C225.3%20400.7%20245.3%20404%20255.5%20418.4C265.8%20432.8%20262.5%20452.8%20248.1%20463.1L246.5%20464.2C188.1%20505.3%20110.2%20498.7%2060.21%20448.8C3.741%20392.3%203.741%20300.7%2060.21%20244.3L172.5%20131.1zM467.5%20380C411%20436.5%20319.5%20436.5%20263%20380C213%20330%20206.5%20251.2%20247.6%20193.7L248.7%20192.1C258.1%20177.8%20278.1%20174.4%20293.3%20184.7C307.7%20194.1%20311.1%20214.1%20300.8%20229.3L299.7%20230.9C276.8%20262.1%20280.4%20306.9%20308.3%20334.8C339.7%20366.2%20390.8%20366.2%20422.3%20334.8L534.5%20222.5C566%20191%20566%20139.1%20534.5%20108.5C506.7%2080.63%20462.7%2076.99%20430.7%2099.9L429.1%20101C414.7%20111.3%20394.7%20107.1%20384.5%2093.58C374.2%2079.2%20377.5%2059.21%20391.9%2048.94L393.5%2047.82C451%206.731%20529.8%2013.25%20579.8%2063.24C636.3%20119.7%20636.3%20211.3%20579.8%20267.7L467.5%20380z'/%3e%3c/svg%3e)
Gradio demos can be easily shared publicly by setting share=True in the launch() method. Like this:
demo.launch(share=True)This generates a public, shareable link that you can send to anybody! When you send this link, the user on the other side can try out the model in their browser. Because the processing happens on your device (as long as your device stays on!), you don't have to worry about any packaging any dependencies. A share link usually looks something like this: XXXXX.gradio.app. Although the link is served through a Gradio URL, we are only a proxy for your local server, and do not store any data sent through your app.
Keep in mind, however, that these links are publicly accessible, meaning that anyone can use your model for prediction! Therefore, make sure not to expose any sensitive information through the functions you write, or allow any critical changes to occur on your device. If you set share=False (the default, except in colab notebooks), only a local link is created, which can be shared by port-forwarding with specific users.

Share links expire after 72 hours.
If you'd like to have a permanent link to your Gradio demo on the internet, use Hugging Face Spaces. Hugging Face Spaces provides the infrastructure to permanently host your machine learning model for free!
After you have created a free Hugging Face account, you have three methods to deploy your Gradio app to Hugging Face Spaces:
From terminal: run gradio deploy in your app directory. The CLI will gather some basic metadata and then launch your app. To update your space, you can re-run this command or enable the Github Actions option to automatically update the Spaces on git push.
From your browser: Drag and drop a folder containing your Gradio model and all related files here.
Connect Spaces with your Git repository and Spaces will pull the Gradio app from there. See this guide how to host on Hugging Face Spaces for more information.
Note: Some components, like gr.Image, will display a "Share" button only on Spaces, so that users can share the generated output to the Discussions page of the Space easily. You can disable this with show_share_button, such as gr.Image(show_share_button=False).
![]()
Once you have hosted your app on Hugging Face Spaces (or on your own server), you may want to embed the demo on a different website, such as your blog or your portfolio. Embedding an interactive demo allows people to try out the machine learning model that you have built, without needing to download or install anything — right in their browser! The best part is that you can embed interactive demos even in static websites, such as GitHub pages.
There are two ways to embed your Gradio demos. You can find quick links to both options directly on the Hugging Face Space page, in the "Embed this Space" dropdown option:

Web components typically offer a better experience to users than IFrames. Web components load lazily, meaning that they won't slow down the loading time of your website, and they automatically adjust their height based on the size of the Gradio app.
To embed with Web Components:
<script
	type="module"
	src="https://gradio.s3-us-west-2.amazonaws.com/{GRADIO_VERSION}/gradio.js"
></script><gradio-app src="https://$your_space_host.hf.space"></gradio-app>element where you want to place the app. Set the src= attribute to your Space's embed URL, which you can find in the "Embed this Space" button. For example:
<gradio-app
	src="https://abidlabs-pytorch-image-classifier.hf.space"
></gradio-app>
You can see examples of how web components look on the Gradio landing page.
You can also customize the appearance and behavior of your web component with attributes that you pass into the <gradio-app> tag:
src: as we've seen, the src attributes links to the URL of the hosted Gradio demo that you would like to embedspace: an optional shorthand if your Gradio demo is hosted on Hugging Face Space. Accepts a username/space_name instead of a full URL. Example: gradio/Echocardiogram-Segmentation. If this attribute attribute is provided, then src does not need to be provided.control_page_title: a boolean designating whether the html title of the page should be set to the title of the Gradio app (by default "false")initial_height: the initial height of the web component while it is loading the Gradio app, (by default "300px"). Note that the final height is set based on the size of the Gradio app.container: whether to show the border frame and information about where the Space is hosted (by default "true")info: whether to show just the information about where the Space is hosted underneath the embedded app (by default "true")autoscroll: whether to autoscroll to the output when prediction has finished (by default "false")eager: whether to load the Gradio app as soon as the page loads (by default "false")theme_mode: whether to use the dark, light, or default system theme mode (by default "system")render: an event that is triggered once the embedded space has finished rendering.Here's an example of how to use these attributes to create a Gradio app that does not lazy load and has an initial height of 0px.
<gradio-app
	space="gradio/Echocardiogram-Segmentation"
	eager="true"
	initial_height="0px"
></gradio-app>
Here's another example of how to use the render event. An event listener is used to capture the render event and will call the handleLoadComplete() function once rendering is complete.
<script>
	function handleLoadComplete() {
		console.log("Embedded space has finished rendering");
	}

	const gradioApp = document.querySelector("gradio-app");
	gradioApp.addEventListener("render", handleLoadComplete);
</script>
Note: While Gradio's CSS will never impact the embedding page, the embedding page can affect the style of the embedded Gradio app. Make sure that any CSS in the parent page isn't so general that it could also apply to the embedded Gradio app and cause the styling to break. Element selectors such as header { ... } and footer { ... } will be the most likely to cause issues.
To embed with IFrames instead (if you cannot add javascript to your website, for example), add this element:
<iframe src="https://$your_space_host.hf.space"></iframe>Again, you can find the src= attribute to your Space's embed URL, which you can find in the "Embed this Space" button.
Note: if you use IFrames, you'll probably want to add a fixed height attribute and set style="border:0;" to remove the boreder. In addition, if your app requires permissions such as access to the webcam or the microphone, you'll need to provide that as well using the allow attribute.
You can use almost any Gradio app as an API! In the footer of a Gradio app like this one, you'll see a "Use via API" link.

This is a page that lists the endpoints that can be used to query the Gradio app, via our supported clients: either the Python client, or the JavaScript client. For each endpoint, Gradio automatically generates the parameters and their types, as well as example inputs.
The endpoints are automatically created when you launch a Gradio Interface. If you are using Gradio Blocks, you can also set up a Gradio API page, though we recommend that you explicitly name each event listener, such as
btn.click(add, [num1, num2], output, api_name="addition")This will add and document the endpoint /api/addition/ to the automatically generated API page. Otherwise, your API endpoints will appear as "unnamed" endpoints.
Note: For Gradio apps in which queueing is enabled, users can bypass the queue if they make a POST request to your API endpoint. To disable this behavior, set api_open=False in the queue() method. To disable the API page altogether, set show_api=False in .launch().
You may wish to put an authentication page in front of your app to limit who can open your app. With the auth= keyword argument in the launch() method, you can provide a tuple with a username and password, or a list of acceptable username/password tuples; Here's an example that provides password-based authentication for a single user named "admin":
demo.launch(auth=("admin", "pass1234"))For more complex authentication handling, you can even pass a function that takes a username and password as arguments, and returns True to allow authentication, False otherwise. This can be used for, among other things, making requests to 3rd-party authentication services.
Here's an example of a function that accepts any login where the username and password are the same:
def same_auth(username, password):
    return username == password
demo.launch(auth=same_auth)
For authentication to work properly, third party cookies must be enabled in your browser. This is not the case by default for Safari, Chrome Incognito Mode.
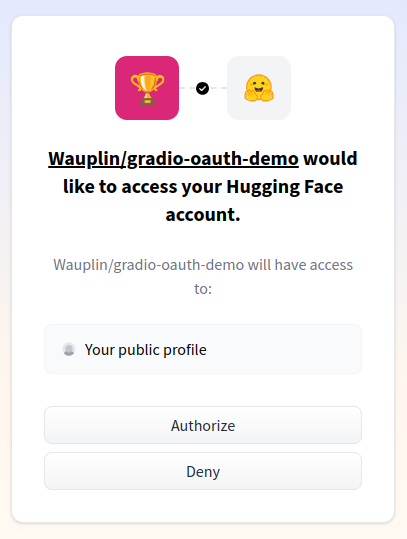
Gradio supports OAuth login via Hugging Face. This feature is currently experimental and only available on Spaces. If allows to add a "Sign in with Hugging Face" button to your demo. Check out this Space for a live demo.
To enable OAuth, you must set hf_oauth: true as a Space metadata in your README.md file. This will register your Space
as an OAuth application on Hugging Face. Next, you can use gr.LoginButton and gr.LogoutButton to add login and logout buttons to
your Gradio app. Once a user is logged in with their HF account, you can retrieve their profile by adding a parameter of type
gr.OAuthProfile to any Gradio function. The user profile will be automatically injected as a parameter value.
Here is a short example:
import gradio as gr


def hello(profile: gr.OAuthProfile | None) -> str:
    if profile is None:
        return "I don't know you."
    return f"Hello {profile.name}"


with gr.Blocks() as demo:
    gr.LoginButton()
    gr.LogoutButton()
    gr.Markdown().attach_load_event(hello, None)
When the user clicks on the login button, they get redirected in a new page to authorize your Space.
Users can revoke access to their profile at any time in their settings.
As seen above, OAuth features are available only when your app runs in a Space. However, you often need to test your app
locally before deploying it. To help with that, the gr.LoginButton is mocked. When a user clicks on it, they are
automatically logged in with a fake user profile. This allows you to debug your app before deploying it to a Space.
When a user makes a prediction to your app, you may need the underlying network request, in order to get the request headers (e.g. for advanced authentication), log the client's IP address, getting the query parameters, or for other reasons. Gradio supports this in a similar manner to FastAPI: simply add a function parameter whose type hint is gr.Request and Gradio will pass in the network request as that parameter. Here is an example:
import gradio as gr

def echo(text, request: gr.Request):
    if request:
        print("Request headers dictionary:", request.headers)
        print("IP address:", request.client.host)
        print("Query parameters:", dict(request.query_params))
    return text

io = gr.Interface(echo, "textbox", "textbox").launch()
Note: if your function is called directly instead of through the UI (this happens, for
example, when examples are cached, or when the Gradio app is called via API), then request will be None.
You should handle this case explicitly to ensure that your app does not throw any errors. That is why
we have the explicit check if request.
In some cases, you might have an existing FastAPI app, and you'd like to add a path for a Gradio demo.
You can easily do this with gradio.mount_gradio_app().
Here's a complete example:
from fastapi import FastAPI
import gradio as gr

CUSTOM_PATH = "/gradio"

app = FastAPI()


@app.get("/")
def read_main():
    return {"message": "This is your main app"}


io = gr.Interface(lambda x: "Hello, " + x + "!", "textbox", "textbox")
app = gr.mount_gradio_app(app, io, path=CUSTOM_PATH)


# Run this from the terminal as you would normally start a FastAPI app: `uvicorn run:app`
# and navigate to http://localhost:8000/gradio in your browser.
Note that this approach also allows you run your Gradio apps on custom paths (http://localhost:8000/gradio in the example above).
Sharing your Gradio app with others (by hosting it on Spaces, on your own server, or through temporary share links) exposes certain files on the host machine to users of your Gradio app.
In particular, Gradio apps ALLOW users to access to three kinds of files:
Files in the same directory (or a subdirectory) of where the Gradio script is launched from. For example, if the path to your gradio scripts is /home/usr/scripts/project/app.py and you launch it from /home/usr/scripts/project/, then users of your shared Gradio app will be able to access any files inside /home/usr/scripts/project/. This is done so that you can easily reference these files in your Gradio app (e.g. for your app's examples).
Temporary files created by Gradio. These are files that are created by Gradio as part of running your prediction function. For example, if your prediction function returns a video file, then Gradio will save that video to a temporary file and then send the path to the temporary file to the front end. You can customize the location of temporary files created by Gradio by setting the environment variable GRADIO_TEMP_DIR to an absolute path, such as /home/usr/scripts/project/temp/.
Files that you explicitly allow via the allowed_paths parameter in launch(). This parameter allows you to pass in a list of additional directories or exact filepaths you'd like to allow users to have access to. (By default, this parameter is an empty list).
Gradio DOES NOT ALLOW access to:
Dotfiles (any files whose name begins with '.') or any files that are contained in any directory whose name begins with '.'
Files that you explicitly block via the blocked_paths parameter in launch(). You can pass in a list of additional directories or exact filepaths to the blocked_paths parameter in launch(). This parameter takes precedence over the files that Gradio exposes by default or by the allowed_paths.
Any other paths on the host machine. Users should NOT be able to access other arbitrary paths on the host.
Please make sure you are running the latest version of gradio for these security settings to apply.