# Build a Custom Multimodal Chatbot - Part 1
This is the first in a two part series where we build a custom Multimodal Chatbot component.
In part 1, we will modify the Gradio Chatbot component to display text and media files (video, audio, image) in the same message.
In part 2, we will build a custom Textbox component that will be able to send multimodal messages (text and media files) to the chatbot.
You can follow along with the author of this post as he implements the chatbot component in the following YouTube video!
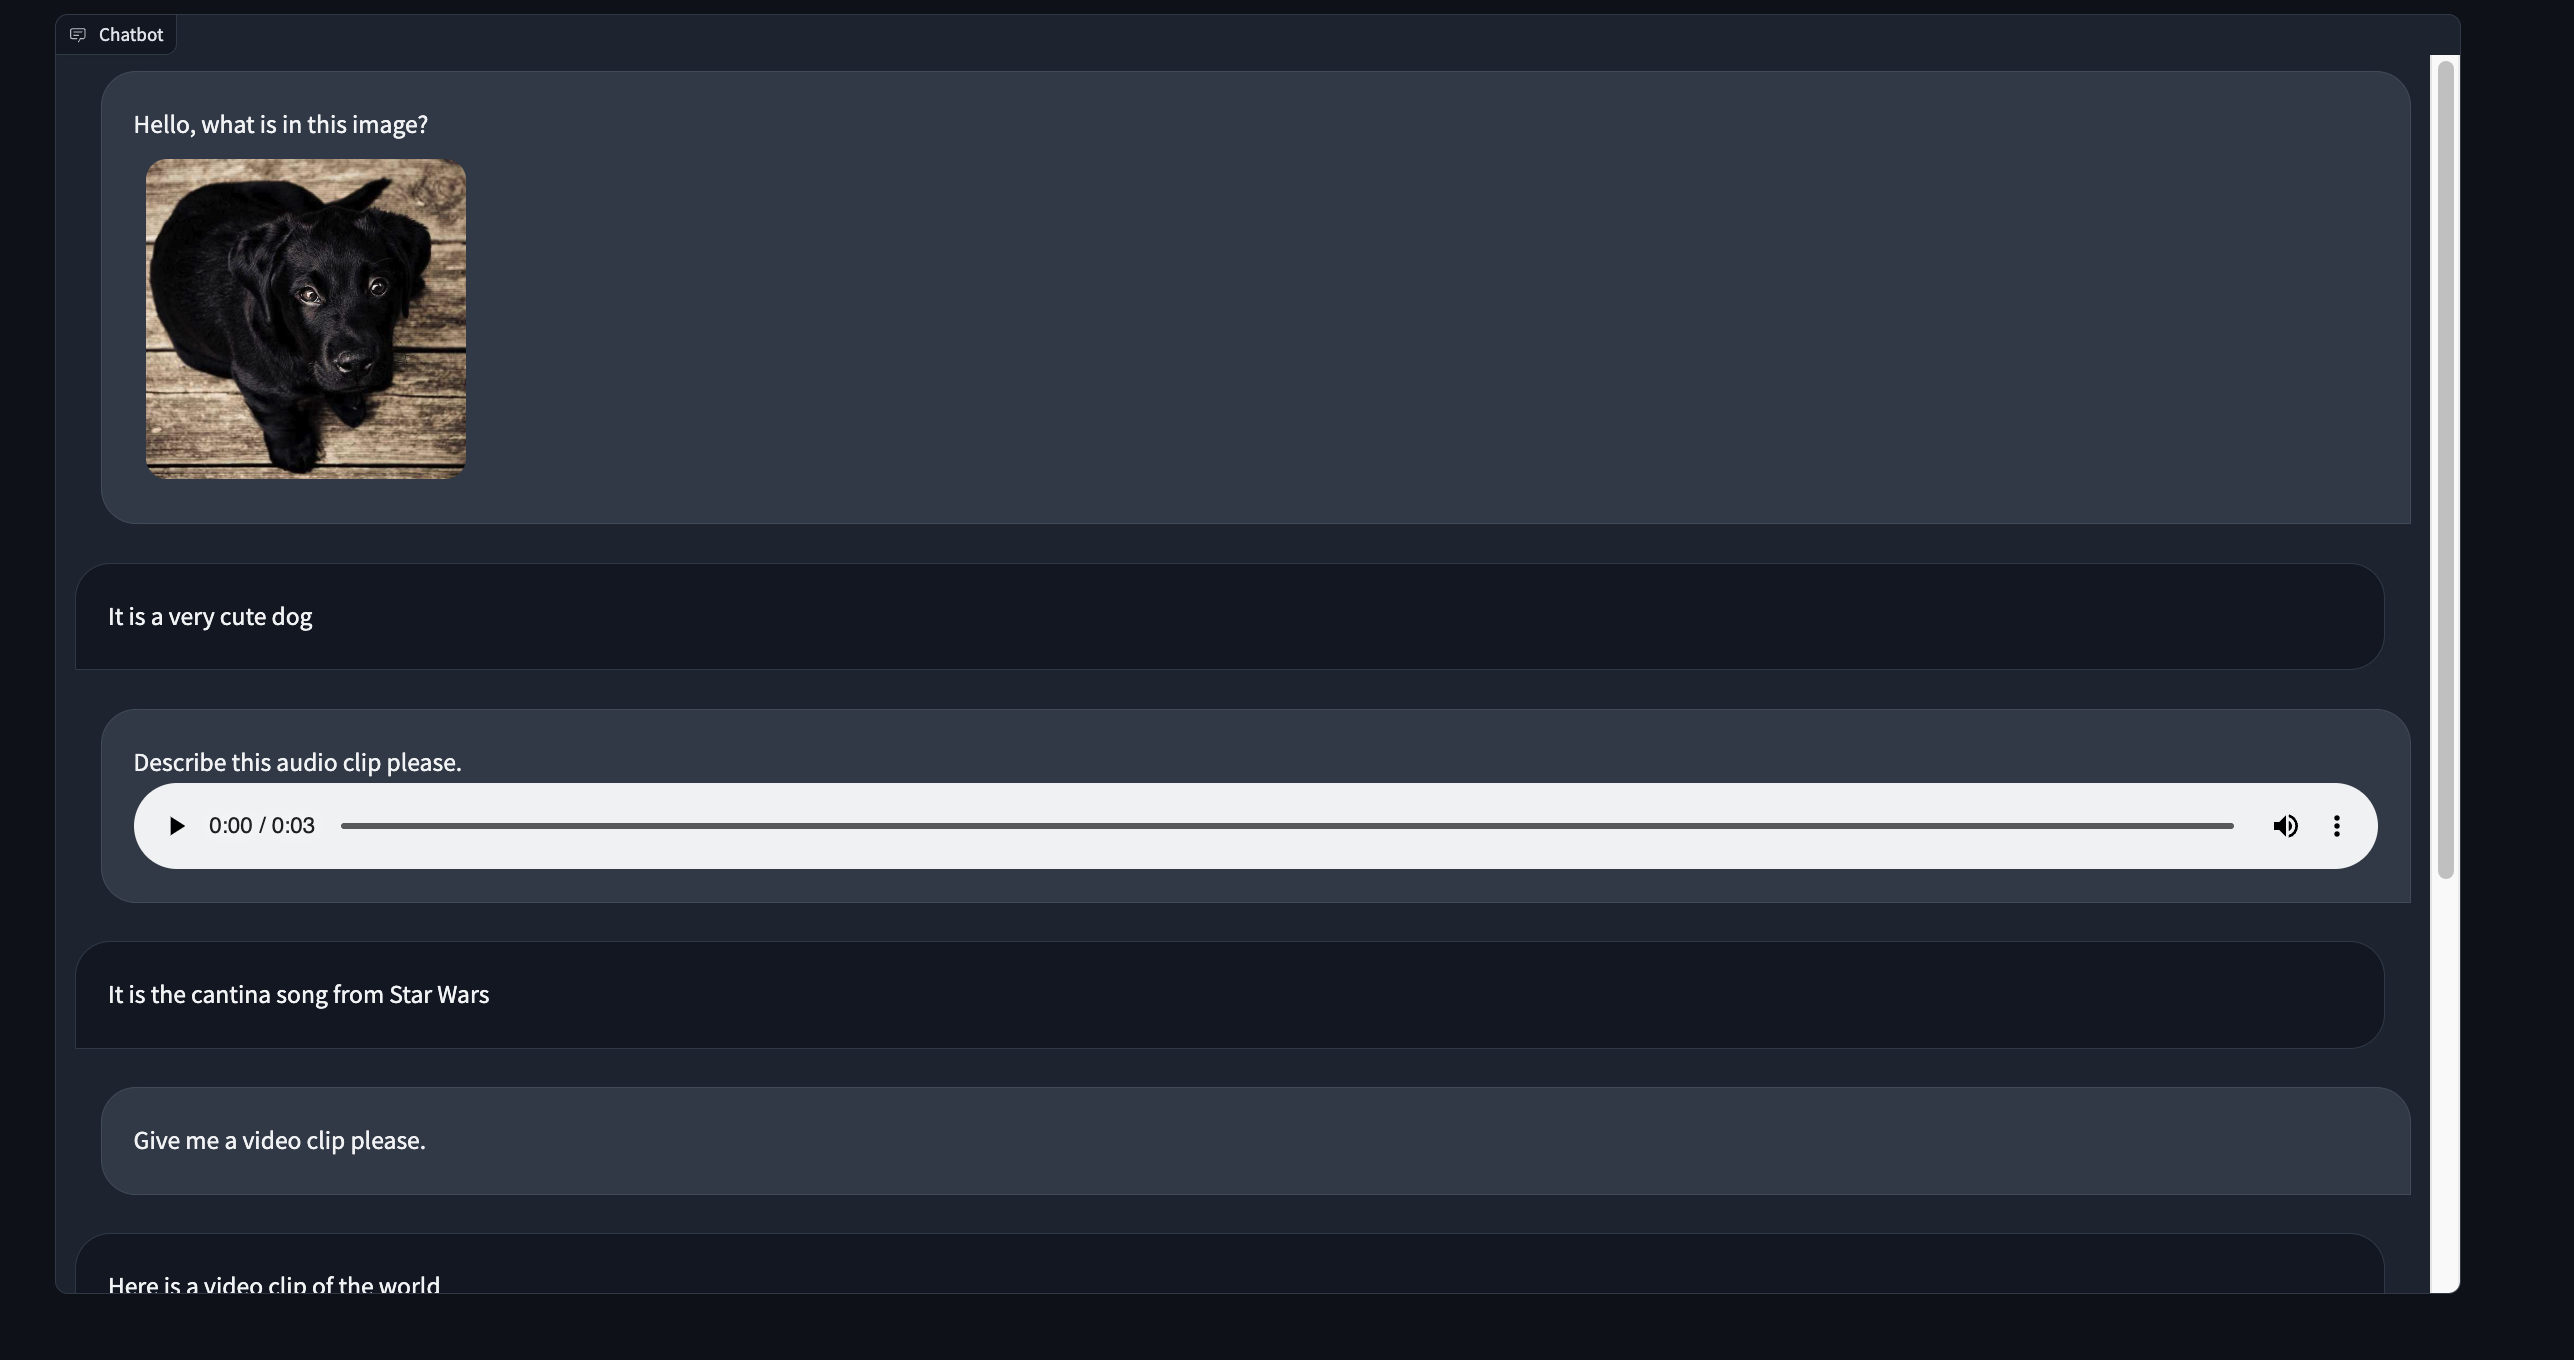
Here's a preview of what our multimodal chatbot component will look like:
## Part 1 - Creating our project
For this demo we will be tweaking the existing Gradio `Chatbot` component to display text and media files in the same message.
Let's create a new custom component directory by templating off of the `Chatbot` component source code.
```bash
gradio cc create MultimodalChatbot --template Chatbot
```
And we're ready to go!
Tip: Make sure to modify the Author key in the pyproject.toml file.
## Part 2a - The backend data_model
Open up the `multimodalchatbot.py` file in your favorite code editor and let's get started modifying the backend of our component.
The first thing we will do is create the `data_model` of our component.
The `data_model` is the data format that your python component will receive and send to the javascript client running the UI.
You can read more about the `data_model` in the [backend guide](./backend).
For our component, each chatbot message will consist of two keys: a `text` key that displays the text message and an optional list of media files that can be displayed underneath the text.
Import the `FileData` and `GradioModel` classes from `gradio.data_classes` and modify the existing `ChatbotData` class to look like the following:
```python
class FileMessage(GradioModel):
file: FileData
alt_text: Optional[str] = None
class MultimodalMessage(GradioModel):
text: Optional[str] = None
files: Optional[List[FileMessage]] = None
class ChatbotData(GradioRootModel):
root: List[Tuple[Optional[MultimodalMessage], Optional[MultimodalMessage]]]
class MultimodalChatbot(Component):
...
data_model = ChatbotData
```
Tip: The data_models are implemented using Pydantic V2. Read the documentation here.
We've done the hardest part already!
## Part 2b - The pre and postprocess methods
For the `preprocess` method, we will keep it simple and pass a list of `MultimodalMessage`s to the python functions that use this component as input.
This will let users of our component access the chatbot data with `.text` and `.files` attributes.
This is a design choice that you can modify in your implementation!
We can return the list of messages with the `root` property of the `ChatbotData` like so:
```python
def preprocess(
self,
payload: ChatbotData | None,
) -> List[MultimodalMessage] | None:
if payload is None:
return payload
return payload.root
```
Tip: Learn about the reasoning behind the preprocess and postprocess methods in the key concepts guide
In the `postprocess` method we will coerce each message returned by the python function to be a `MultimodalMessage` class.
We will also clean up any indentation in the `text` field so that it can be properly displayed as markdown in the frontend.
We can leave the `postprocess` method as is and modify the `_postprocess_chat_messages`
```python
def _postprocess_chat_messages(
self, chat_message: MultimodalMessage | dict | None
) -> MultimodalMessage | None:
if chat_message is None:
return None
if isinstance(chat_message, dict):
chat_message = MultimodalMessage(**chat_message)
chat_message.text = inspect.cleandoc(chat_message.text or "")
for file_ in chat_message.files:
file_.file.mime_type = client_utils.get_mimetype(file_.file.path)
return chat_message
```
Before we wrap up with the backend code, let's modify the `example_value` and `example_payload` method to return a valid dictionary representation of the `ChatbotData`:
```python
def example_value(self) -> Any:
return [[{"text": "Hello!", "files": []}, None]]
def example_payload(self) -> Any:
return [[{"text": "Hello!", "files": []}, None]]
```
Congrats - the backend is complete!
## Part 3a - The Index.svelte file
The frontend for the `Chatbot` component is divided into two parts - the `Index.svelte` file and the `shared/Chatbot.svelte` file.
The `Index.svelte` file applies some processing to the data received from the server and then delegates the rendering of the conversation to the `shared/Chatbot.svelte` file.
First we will modify the `Index.svelte` file to apply processing to the new data type the backend will return.
Let's begin by porting our custom types from our python `data_model` to typescript.
Open `frontend/shared/utils.ts` and add the following type definitions at the top of the file:
```ts
export type FileMessage = {
file: FileData;
alt_text?: string;
};
export type MultimodalMessage = {
text: string;
files?: FileMessage[];
}
```
Now let's import them in `Index.svelte` and modify the type annotations for `value` and `_value`.
```ts
import type { FileMessage, MultimodalMessage } from "./shared/utils";
export let value: [
MultimodalMessage | null,
MultimodalMessage | null
][] = [];
let _value: [
MultimodalMessage | null,
MultimodalMessage | null
][];
```
We need to normalize each message to make sure each file has a proper URL to fetch its contents from.
We also need to format any embedded file links in the `text` key.
Let's add a `process_message` utility function and apply it whenever the `value` changes.
```ts
function process_message(msg: MultimodalMessage | null): MultimodalMessage | null {
if (msg === null) {
return msg;
}
msg.text = redirect_src_url(msg.text);
msg.files = msg.files.map(normalize_messages);
return msg;
}
$: _value = value
? value.map(([user_msg, bot_msg]) => [
process_message(user_msg),
process_message(bot_msg)
])
: [];
```
## Part 3b - the Chatbot.svelte file
Let's begin similarly to the `Index.svelte` file and let's first modify the type annotations.
Import `Mulimodal` message at the top of the `