# Case Study: A Component to Display PDFs
Let's work through an example of building a custom gradio component for displaying PDF files.
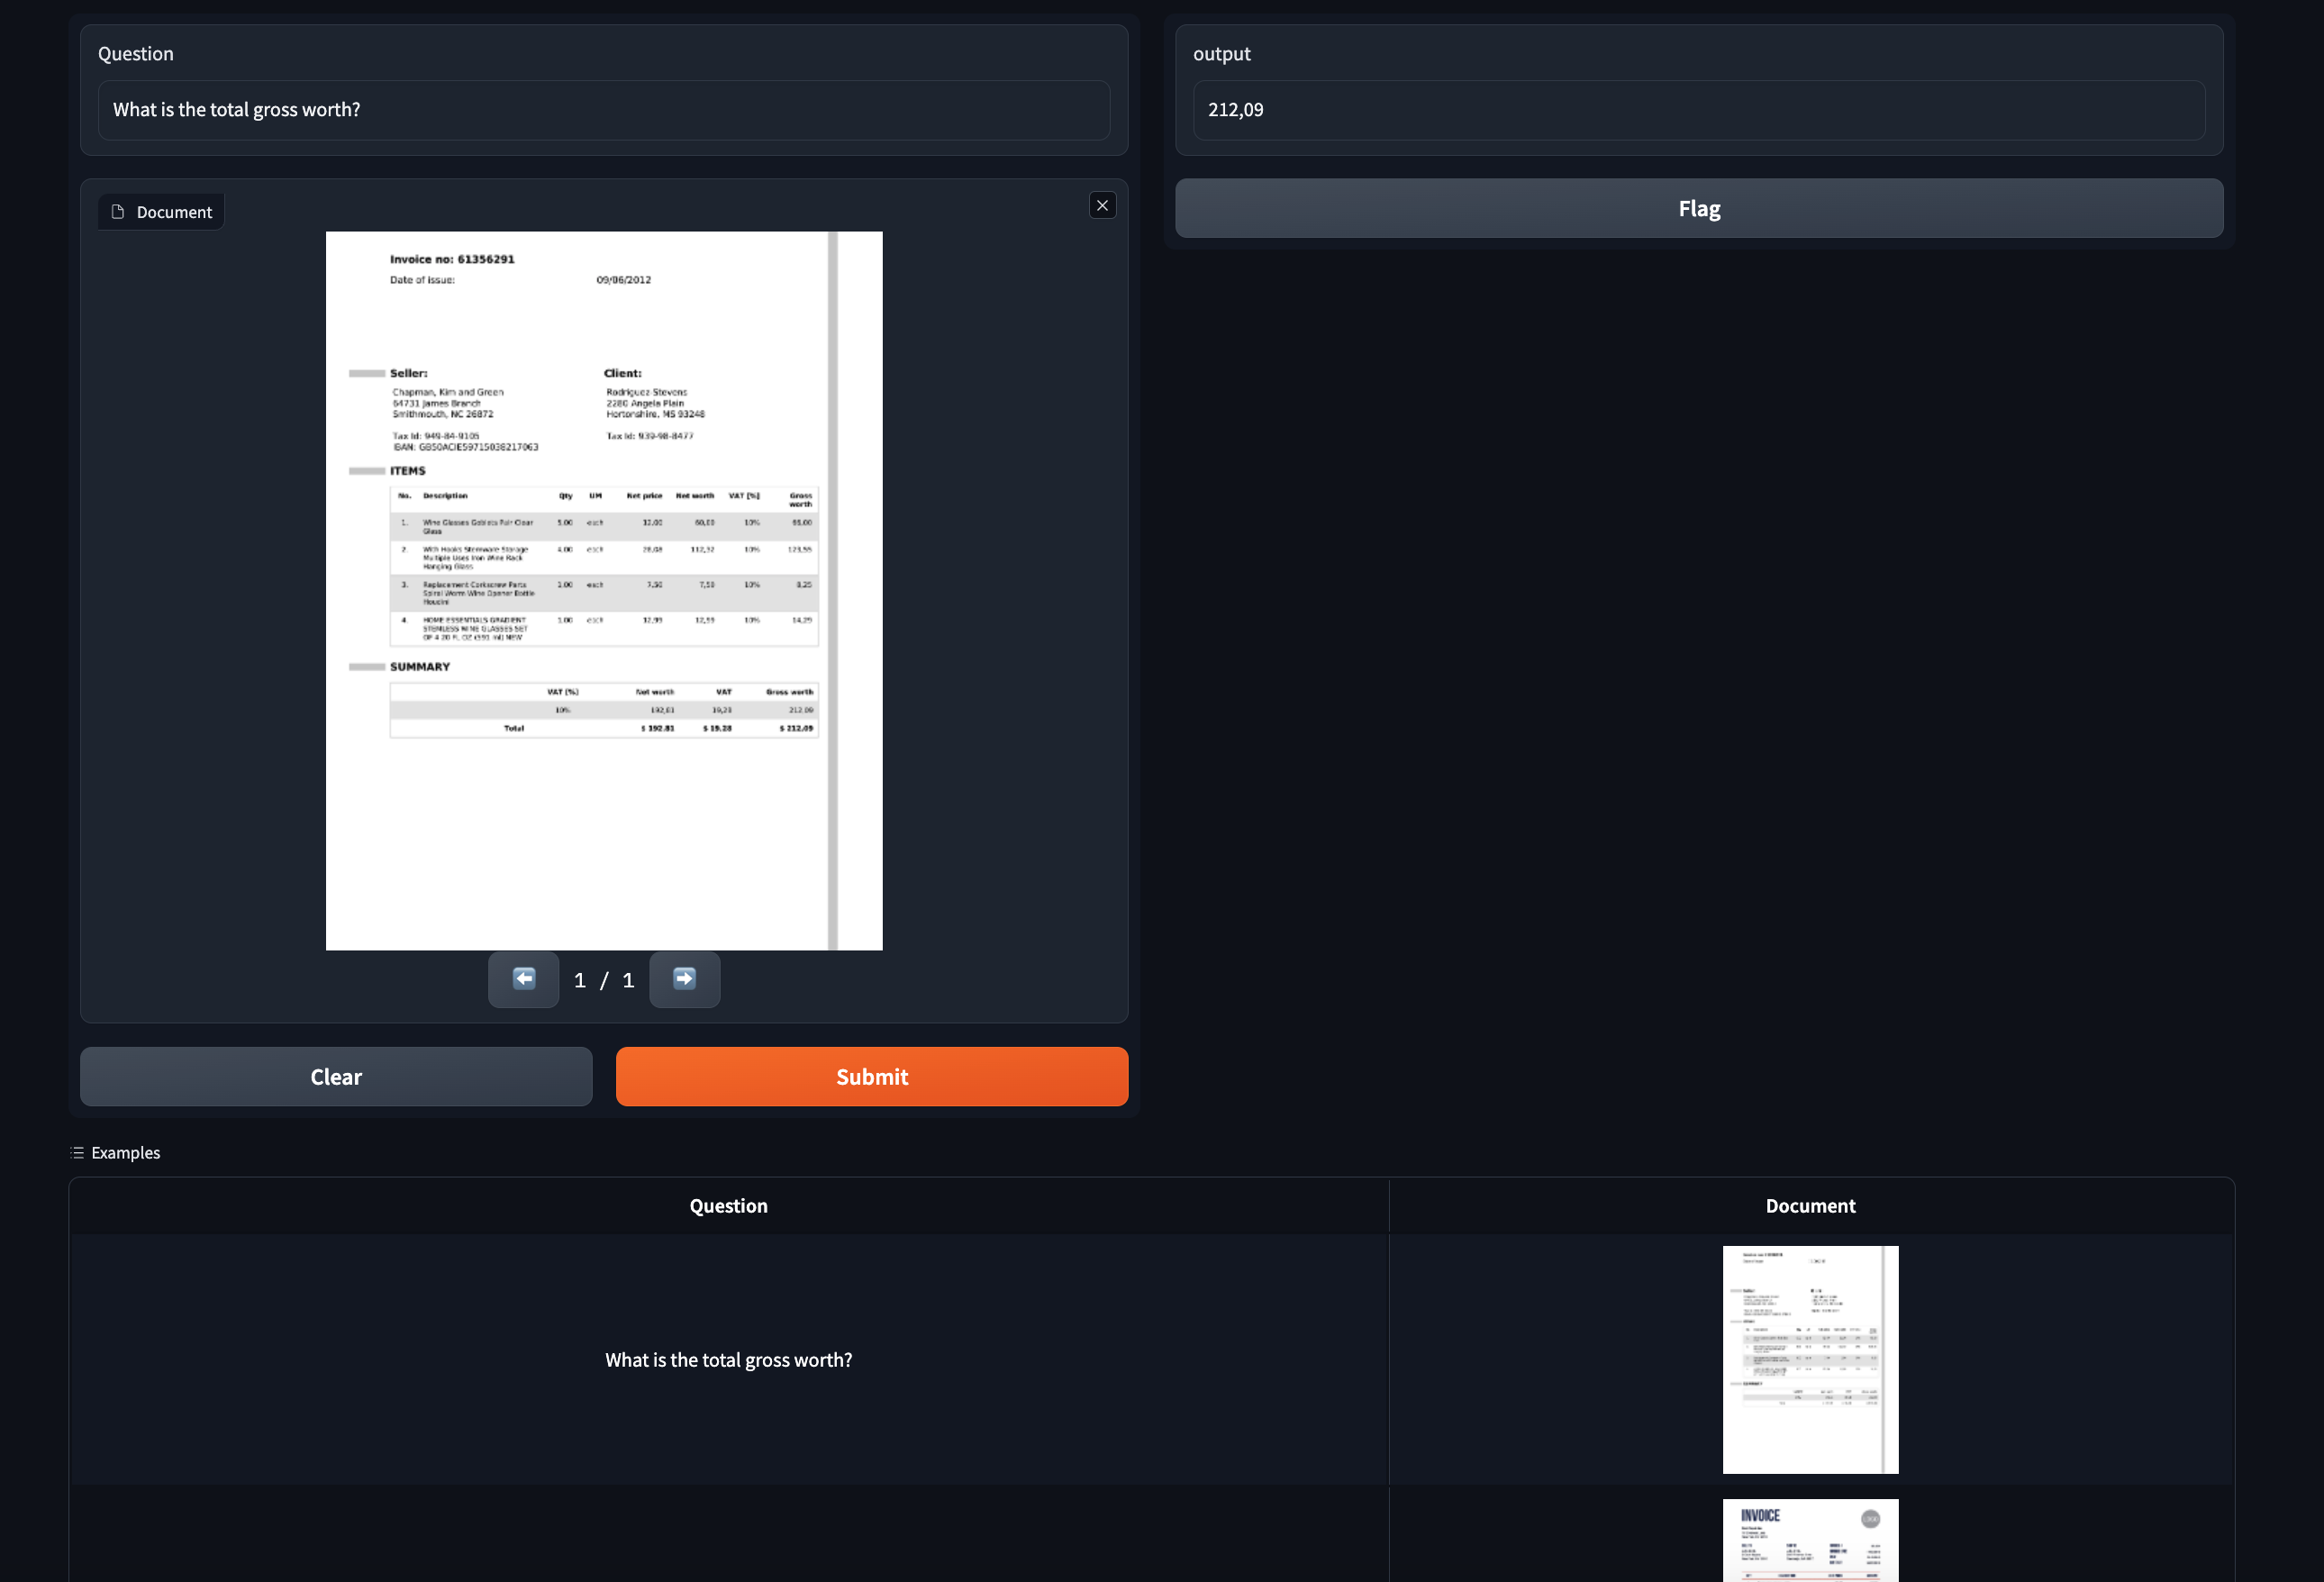
This component will come in handy for showcasing [document question answering](https://huggingface.co/models?pipeline_tag=document-question-answering&sort=trending) models, which typically work on PDF input.
This is a sneak preview of what our finished component will look like:
## Step 0: Prerequisites
Make sure you have gradio 5.0 or higher installed as well as node 20+.
As of the time of publication, the latest release is 4.1.1.
Also, please read the [Five Minute Tour](./custom-components-in-five-minutes) of custom components and the [Key Concepts](./key-component-concepts) guide before starting.
## Step 1: Creating the custom component
Navigate to a directory of your choosing and run the following command:
```bash
gradio cc create PDF
```
Tip: You should change the name of the component.
Some of the screenshots assume the component is called `PDF` but the concepts are the same!
This will create a subdirectory called `pdf` in your current working directory.
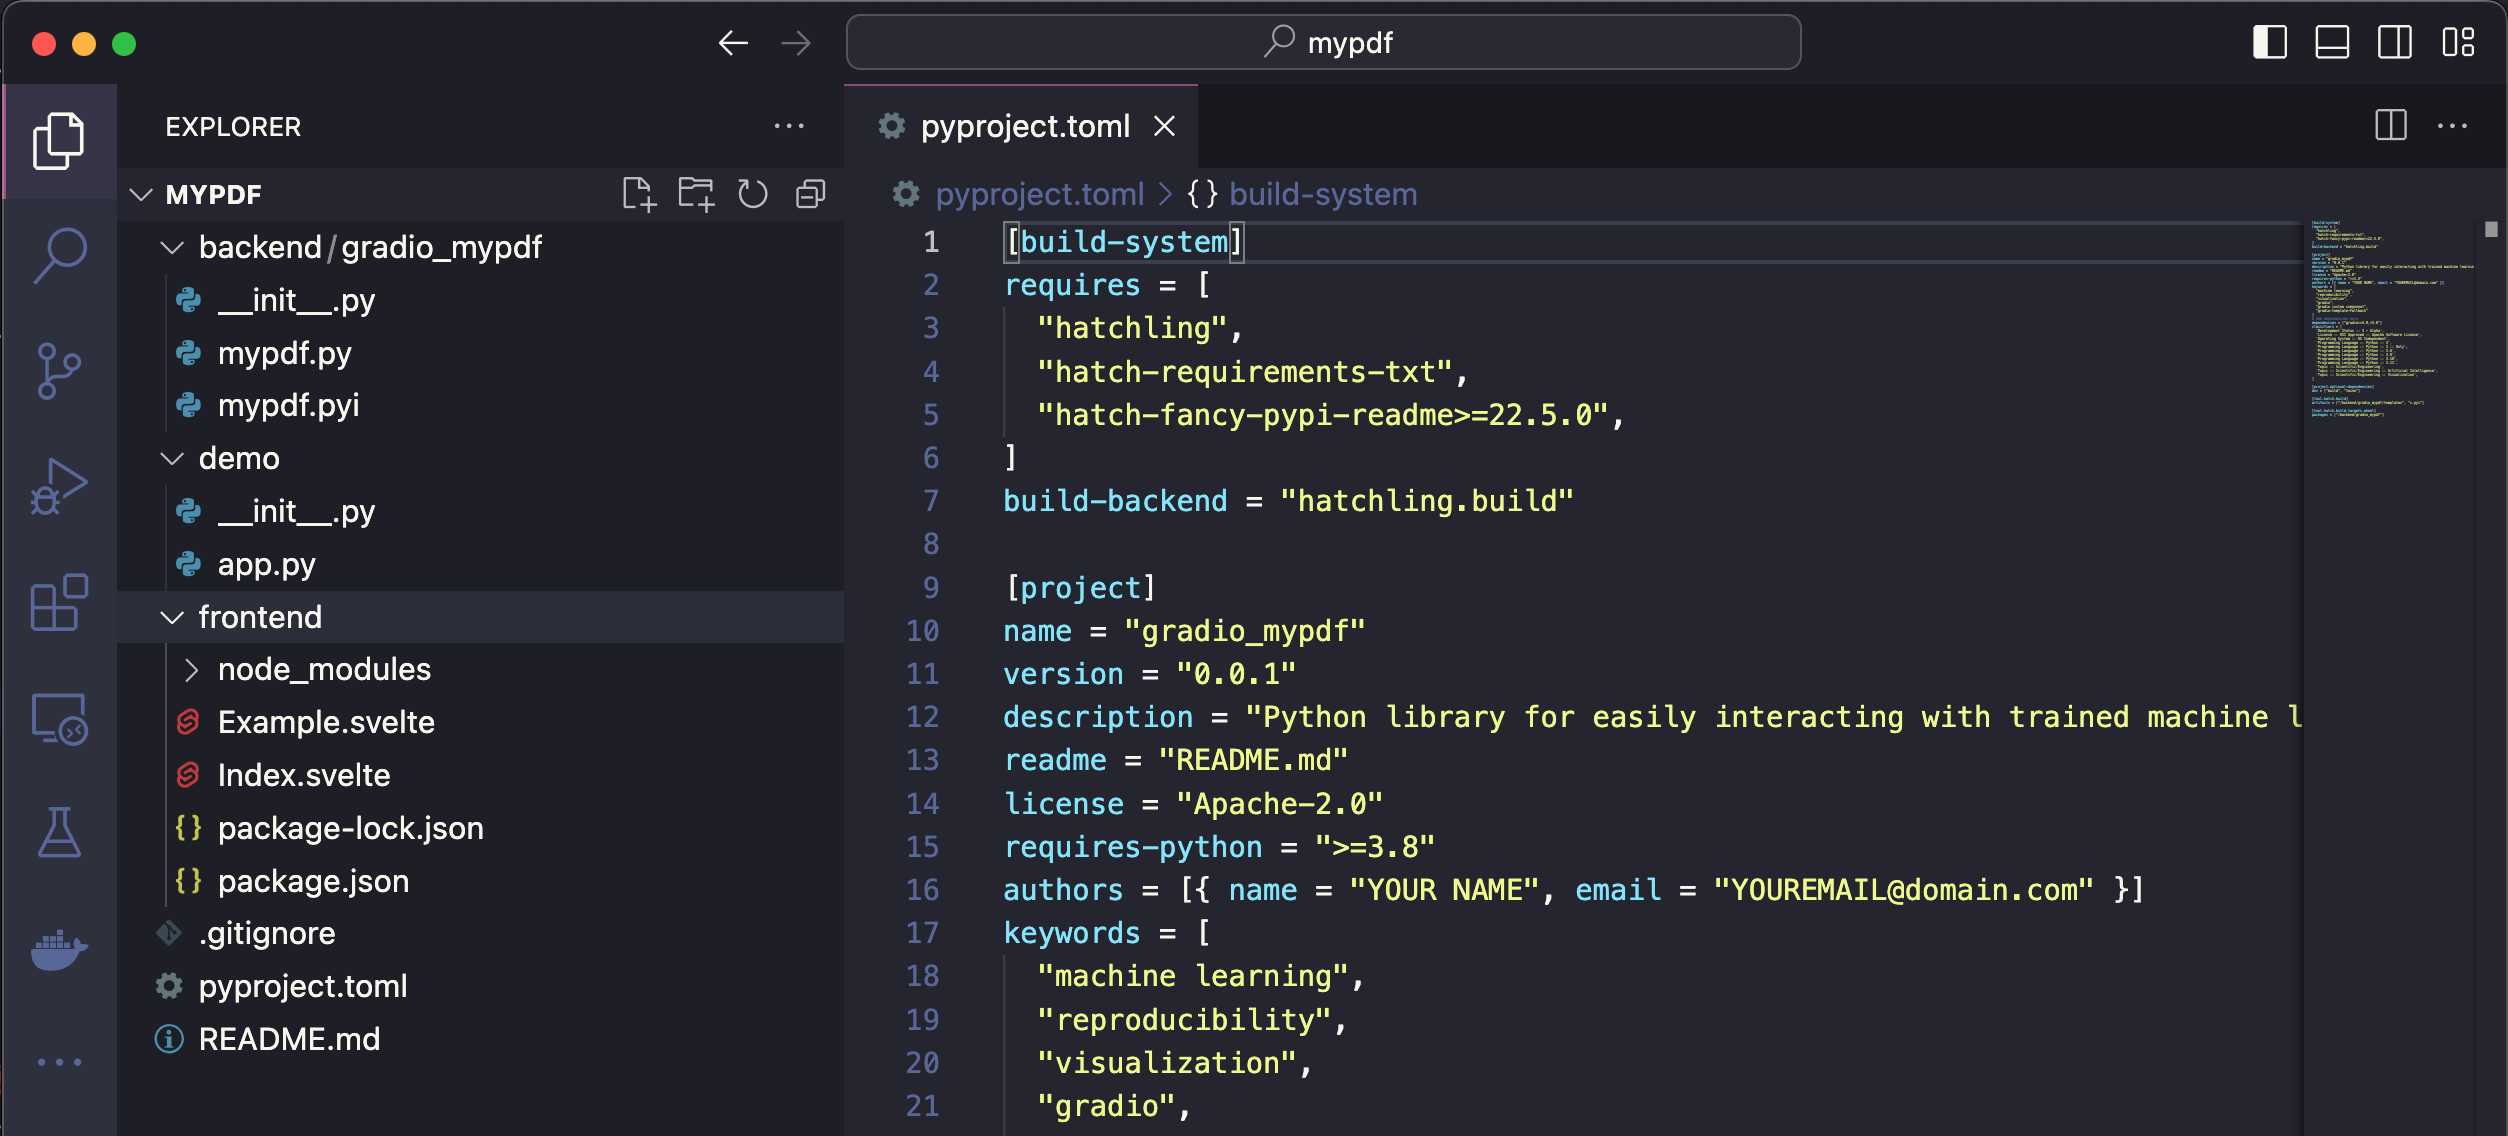
There are three main subdirectories in `pdf`: `frontend`, `backend`, and `demo`.
If you open `pdf` in your code editor, it will look like this:
Tip: For this demo we are not templating off a current gradio component. But you can see the list of available templates with gradio cc show and then pass the template name to the --template option, e.g. gradio cc create <Name> --template <foo>
## Step 2: Frontend - modify javascript dependencies
We're going to use the [pdfjs](https://mozilla.github.io/pdf.js/) javascript library to display the pdfs in the frontend.
Let's start off by adding it to our frontend project's dependencies, as well as adding a couple of other projects we'll need.
From within the `frontend` directory, run `npm install @gradio/client @gradio/upload @gradio/icons @gradio/button` and `npm install --save-dev pdfjs-dist@3.11.174`.
Also, let's uninstall the `@zerodevx/svelte-json-view` dependency by running `npm uninstall @zerodevx/svelte-json-view`.
The complete `package.json` should look like this:
```json
{
"name": "gradio_pdf",
"version": "0.2.0",
"description": "Gradio component for displaying PDFs",
"type": "module",
"author": "",
"license": "ISC",
"private": false,
"main_changeset": true,
"exports": {
".": "./Index.svelte",
"./example": "./Example.svelte",
"./package.json": "./package.json"
},
"devDependencies": {
"pdfjs-dist": "3.11.174"
},
"dependencies": {
"@gradio/atoms": "0.2.0",
"@gradio/statustracker": "0.3.0",
"@gradio/utils": "0.2.0",
"@gradio/client": "0.7.1",
"@gradio/upload": "0.3.2",
"@gradio/icons": "0.2.0",
"@gradio/button": "0.2.3",
"pdfjs-dist": "3.11.174"
}
}
```
Tip: Running npm install will install the latest version of the package available. You can install a specific version with npm install package@<version>. You can find all of the gradio javascript package documentation here. It is recommended you use the same versions as me as the API can change.
Navigate to `Index.svelte` and delete mentions of `JSONView`
```ts
import { JsonView } from "@zerodevx/svelte-json-view";
```
```svelte
```
## Step 3: Frontend - Launching the Dev Server
Run the `dev` command to launch the development server.
This will open the demo in `demo/app.py` in an environment where changes to the `frontend` and `backend` directories will reflect instantaneously in the launched app.
After launching the dev server, you should see a link printed to your console that says `Frontend Server (Go here): ... `.
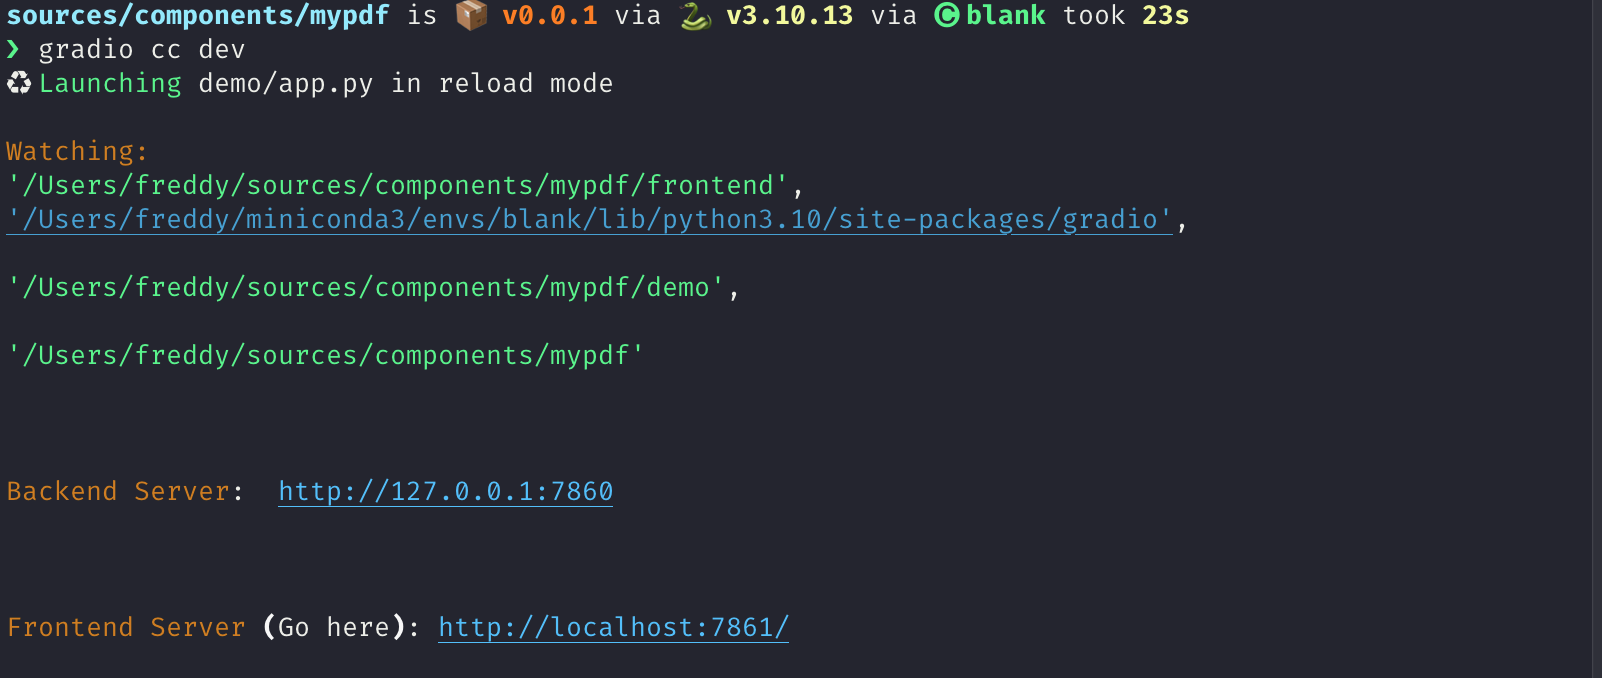
You should see the following:

Its not impressive yet but we're ready to start coding!
## Step 4: Frontend - The basic skeleton
We're going to start off by first writing the skeleton of our frontend and then adding the pdf rendering logic.
Add the following imports and expose the following properties to the top of your file in the `` tag, delete all the current code and add the following:
```svelte
{#if loading_status}
{/if}
{#if _value}
{:else}
Upload your PDF
{/if}
```
You should see the following when you navigate to your app after saving your current changes:

## Step 5: Frontend - Nicer Upload Text
The `Upload your PDF` text looks a bit small and barebones.
Lets customize it!
Create a new file called `PdfUploadText.svelte` and copy the following code.
Its creating a new div to display our "upload text" with some custom styling.
Tip: Notice that we're leveraging Gradio core's existing css variables here: var(--size-60) and var(--body-text-color-subdued). This allows our component to work nicely in light mode and dark mode, as well as with Gradio's built-in themes.
```svelte
Drop PDF
- or -
Click to Upload
```
Now import `PdfUploadText.svelte` in your `
```
Tip: Exercise for the reader - reduce the code duplication between Index.svelte and Example.svelte 😊
You will not be able to render examples until we make some changes to the backend code in the next step!
## Step 9: The backend
The backend changes needed are smaller.
We're almost done!
What we're going to do is:
* Add `change` and `upload` events to our component.
* Add a `height` property to let users control the height of the PDF.
* Set the `data_model` of our component to be `FileData`. This is so that Gradio can automatically cache and safely serve any files that are processed by our component.
* Modify the `preprocess` method to return a string corresponding to the path of our uploaded PDF.
* Modify the `postprocess` to turn a path to a PDF created in an event handler to a `FileData`.
When all is said an done, your component's backend code should look like this:
```python
from __future__ import annotations
from typing import Any, Callable, TYPE_CHECKING
from gradio.components.base import Component
from gradio.data_classes import FileData
from gradio import processing_utils
if TYPE_CHECKING:
from gradio.components import Timer
class PDF(Component):
EVENTS = ["change", "upload"]
data_model = FileData
def __init__(self, value: Any = None, *,
height: int | None = None,
label: str | I18nData | None = None,
info: str | I18nData | None = None,
show_label: bool | None = None,
container: bool = True,
scale: int | None = None,
min_width: int | None = None,
interactive: bool | None = None,
visible: bool = True,
elem_id: str | None = None,
elem_classes: list[str] | str | None = None,
render: bool = True,
load_fn: Callable[..., Any] | None = None,
every: Timer | float | None = None):
super().__init__(value, label=label, info=info,
show_label=show_label, container=container,
scale=scale, min_width=min_width,
interactive=interactive, visible=visible,
elem_id=elem_id, elem_classes=elem_classes,
render=render, load_fn=load_fn, every=every)
self.height = height
def preprocess(self, payload: FileData) -> str:
return payload.path
def postprocess(self, value: str | None) -> FileData:
if not value:
return None
return FileData(path=value)
def example_payload(self):
return "https://gradio-builds.s3.amazonaws.com/assets/pdf-guide/fw9.pdf"
def example_value(self):
return "https://gradio-builds.s3.amazonaws.com/assets/pdf-guide/fw9.pdf"
```
## Step 10: Add a demo and publish!
To test our backend code, let's add a more complex demo that performs Document Question and Answering with huggingface transformers.
In our `demo` directory, create a `requirements.txt` file with the following packages
```
torch
transformers
pdf2image
pytesseract
```
Tip: Remember to install these yourself and restart the dev server! You may need to install extra non-python dependencies for pdf2image. See here. Feel free to write your own demo if you have trouble.
```python
import gradio as gr
from gradio_pdf import PDF
from pdf2image import convert_from_path
from transformers import pipeline
from pathlib import Path
dir_ = Path(__file__).parent
p = pipeline(
"document-question-answering",
model="impira/layoutlm-document-qa",
)
def qa(question: str, doc: str) -> str:
img = convert_from_path(doc)[0]
output = p(img, question)
return sorted(output, key=lambda x: x["score"], reverse=True)[0]['answer']
demo = gr.Interface(
qa,
[gr.Textbox(label="Question"), PDF(label="Document")],
gr.Textbox(),
)
demo.launch()
```
See our demo in action below!
Finally lets build our component with `gradio cc build` and publish it with the `gradio cc publish` command!
This will guide you through the process of uploading your component to [PyPi](https://pypi.org/) and [HuggingFace Spaces](https://huggingface.co/spaces).
Tip: You may need to add the following lines to the Dockerfile of your HuggingFace Space.
```Dockerfile
RUN mkdir -p /tmp/cache/
RUN chmod a+rwx -R /tmp/cache/
RUN apt-get update && apt-get install -y poppler-utils tesseract-ocr
ENV TRANSFORMERS_CACHE=/tmp/cache/
```
## Conclusion
In order to use our new component in **any** gradio 4.0 app, simply install it with pip, e.g. `pip install gradio-pdf`. Then you can use it like the built-in `gr.File()` component (except that it will only accept and display PDF files).
Here is a simple demo with the Blocks api:
```python
import gradio as gr
from gradio_pdf import PDF
with gr.Blocks() as demo:
pdf = PDF(label="Upload a PDF", interactive=True)
name = gr.Textbox()
pdf.upload(lambda f: f, pdf, name)
demo.launch()
```
I hope you enjoyed this tutorial!
The complete source code for our component is [here](https://huggingface.co/spaces/freddyaboulton/gradio_pdf/tree/main/src).
Please don't hesitate to reach out to the gradio community on the [HuggingFace Discord](https://discord.gg/hugging-face-879548962464493619) if you get stuck.